Facebook Messenger Integration

published March 9, 2020 | updated March 9, 2020

Stockbot Messenger integration allows you to send back in stock notifications to customers straight to their Facebook Messenger inbox.

This provides better open rates than email as well as opening a conversation with the customer for you to manually send messages to them.

Requirements

The only requirements for the integration are that your company has a Facebook page, and you have management access to that page.

Setup

To setup your Facebook page there are two simple steps you must complete.

1. Your Facebook Page

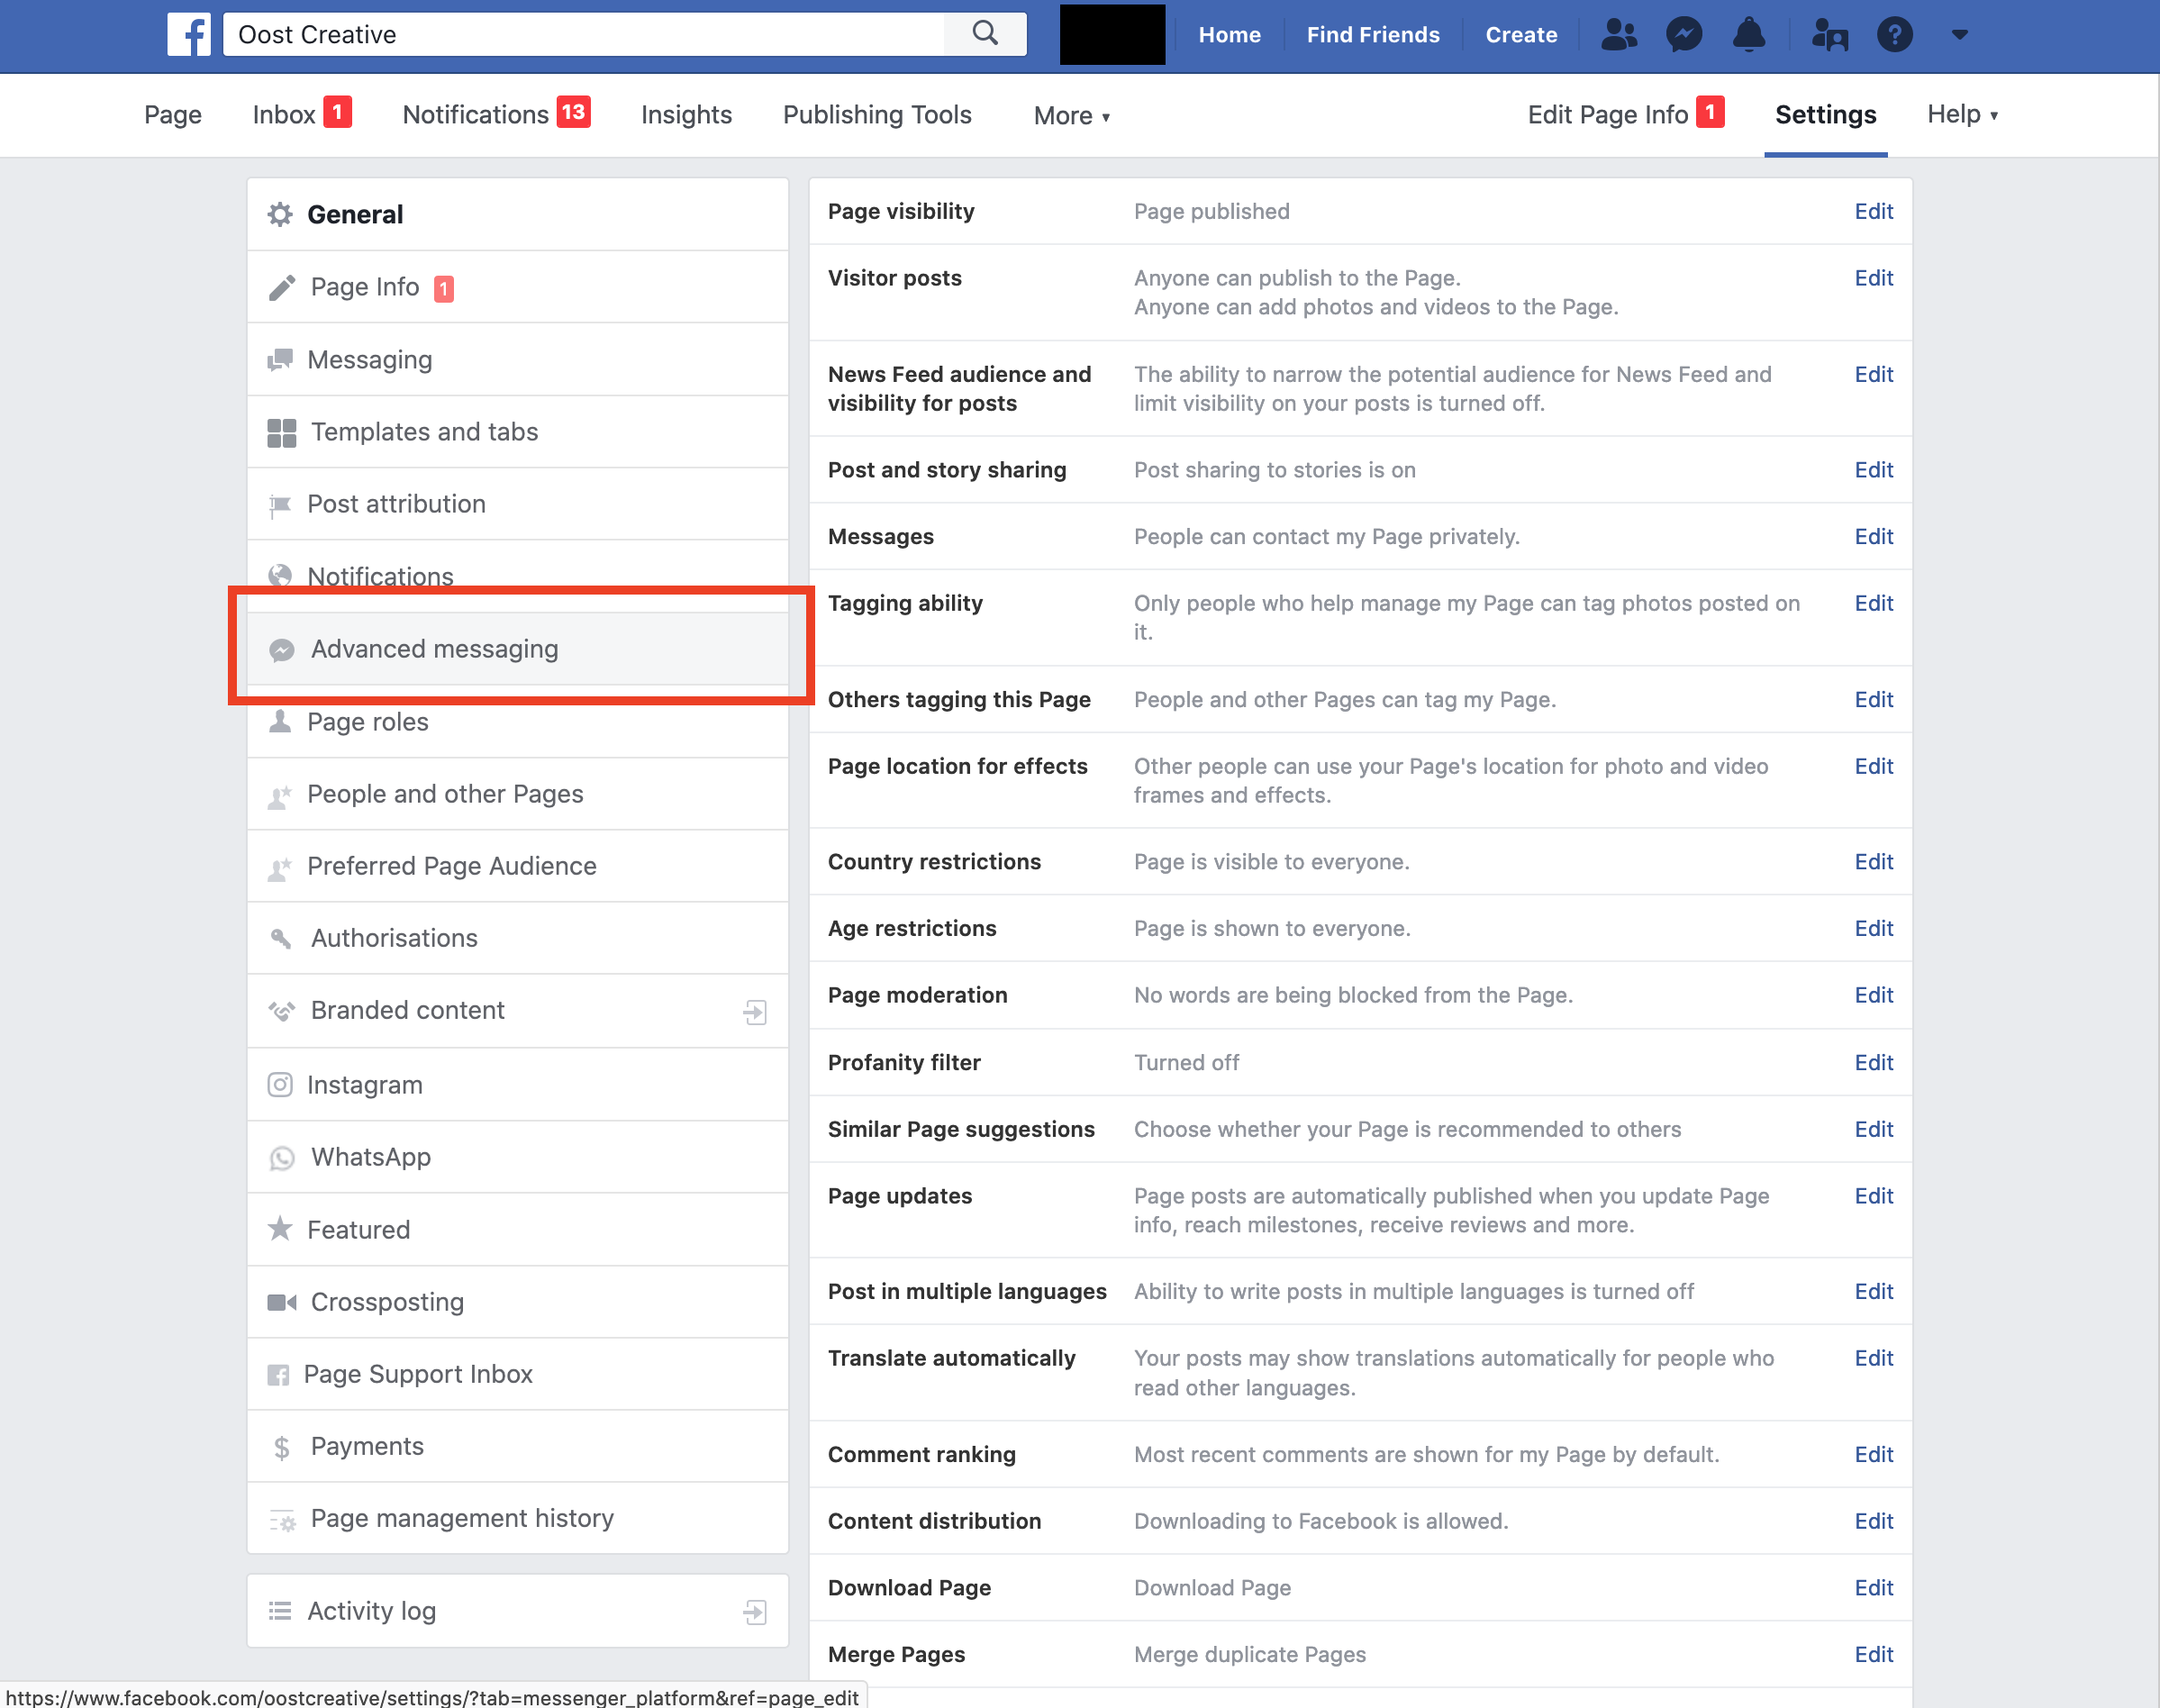
Visit the page settings for the page you want to send messages from. This should be a page that has been setup for your store, to avoid any confusion from customers it should have the same name, logo, etc.

Once in the settings page, click the “Advanced Messaging” tab on the left column.

2. Advanced Messaging Settings

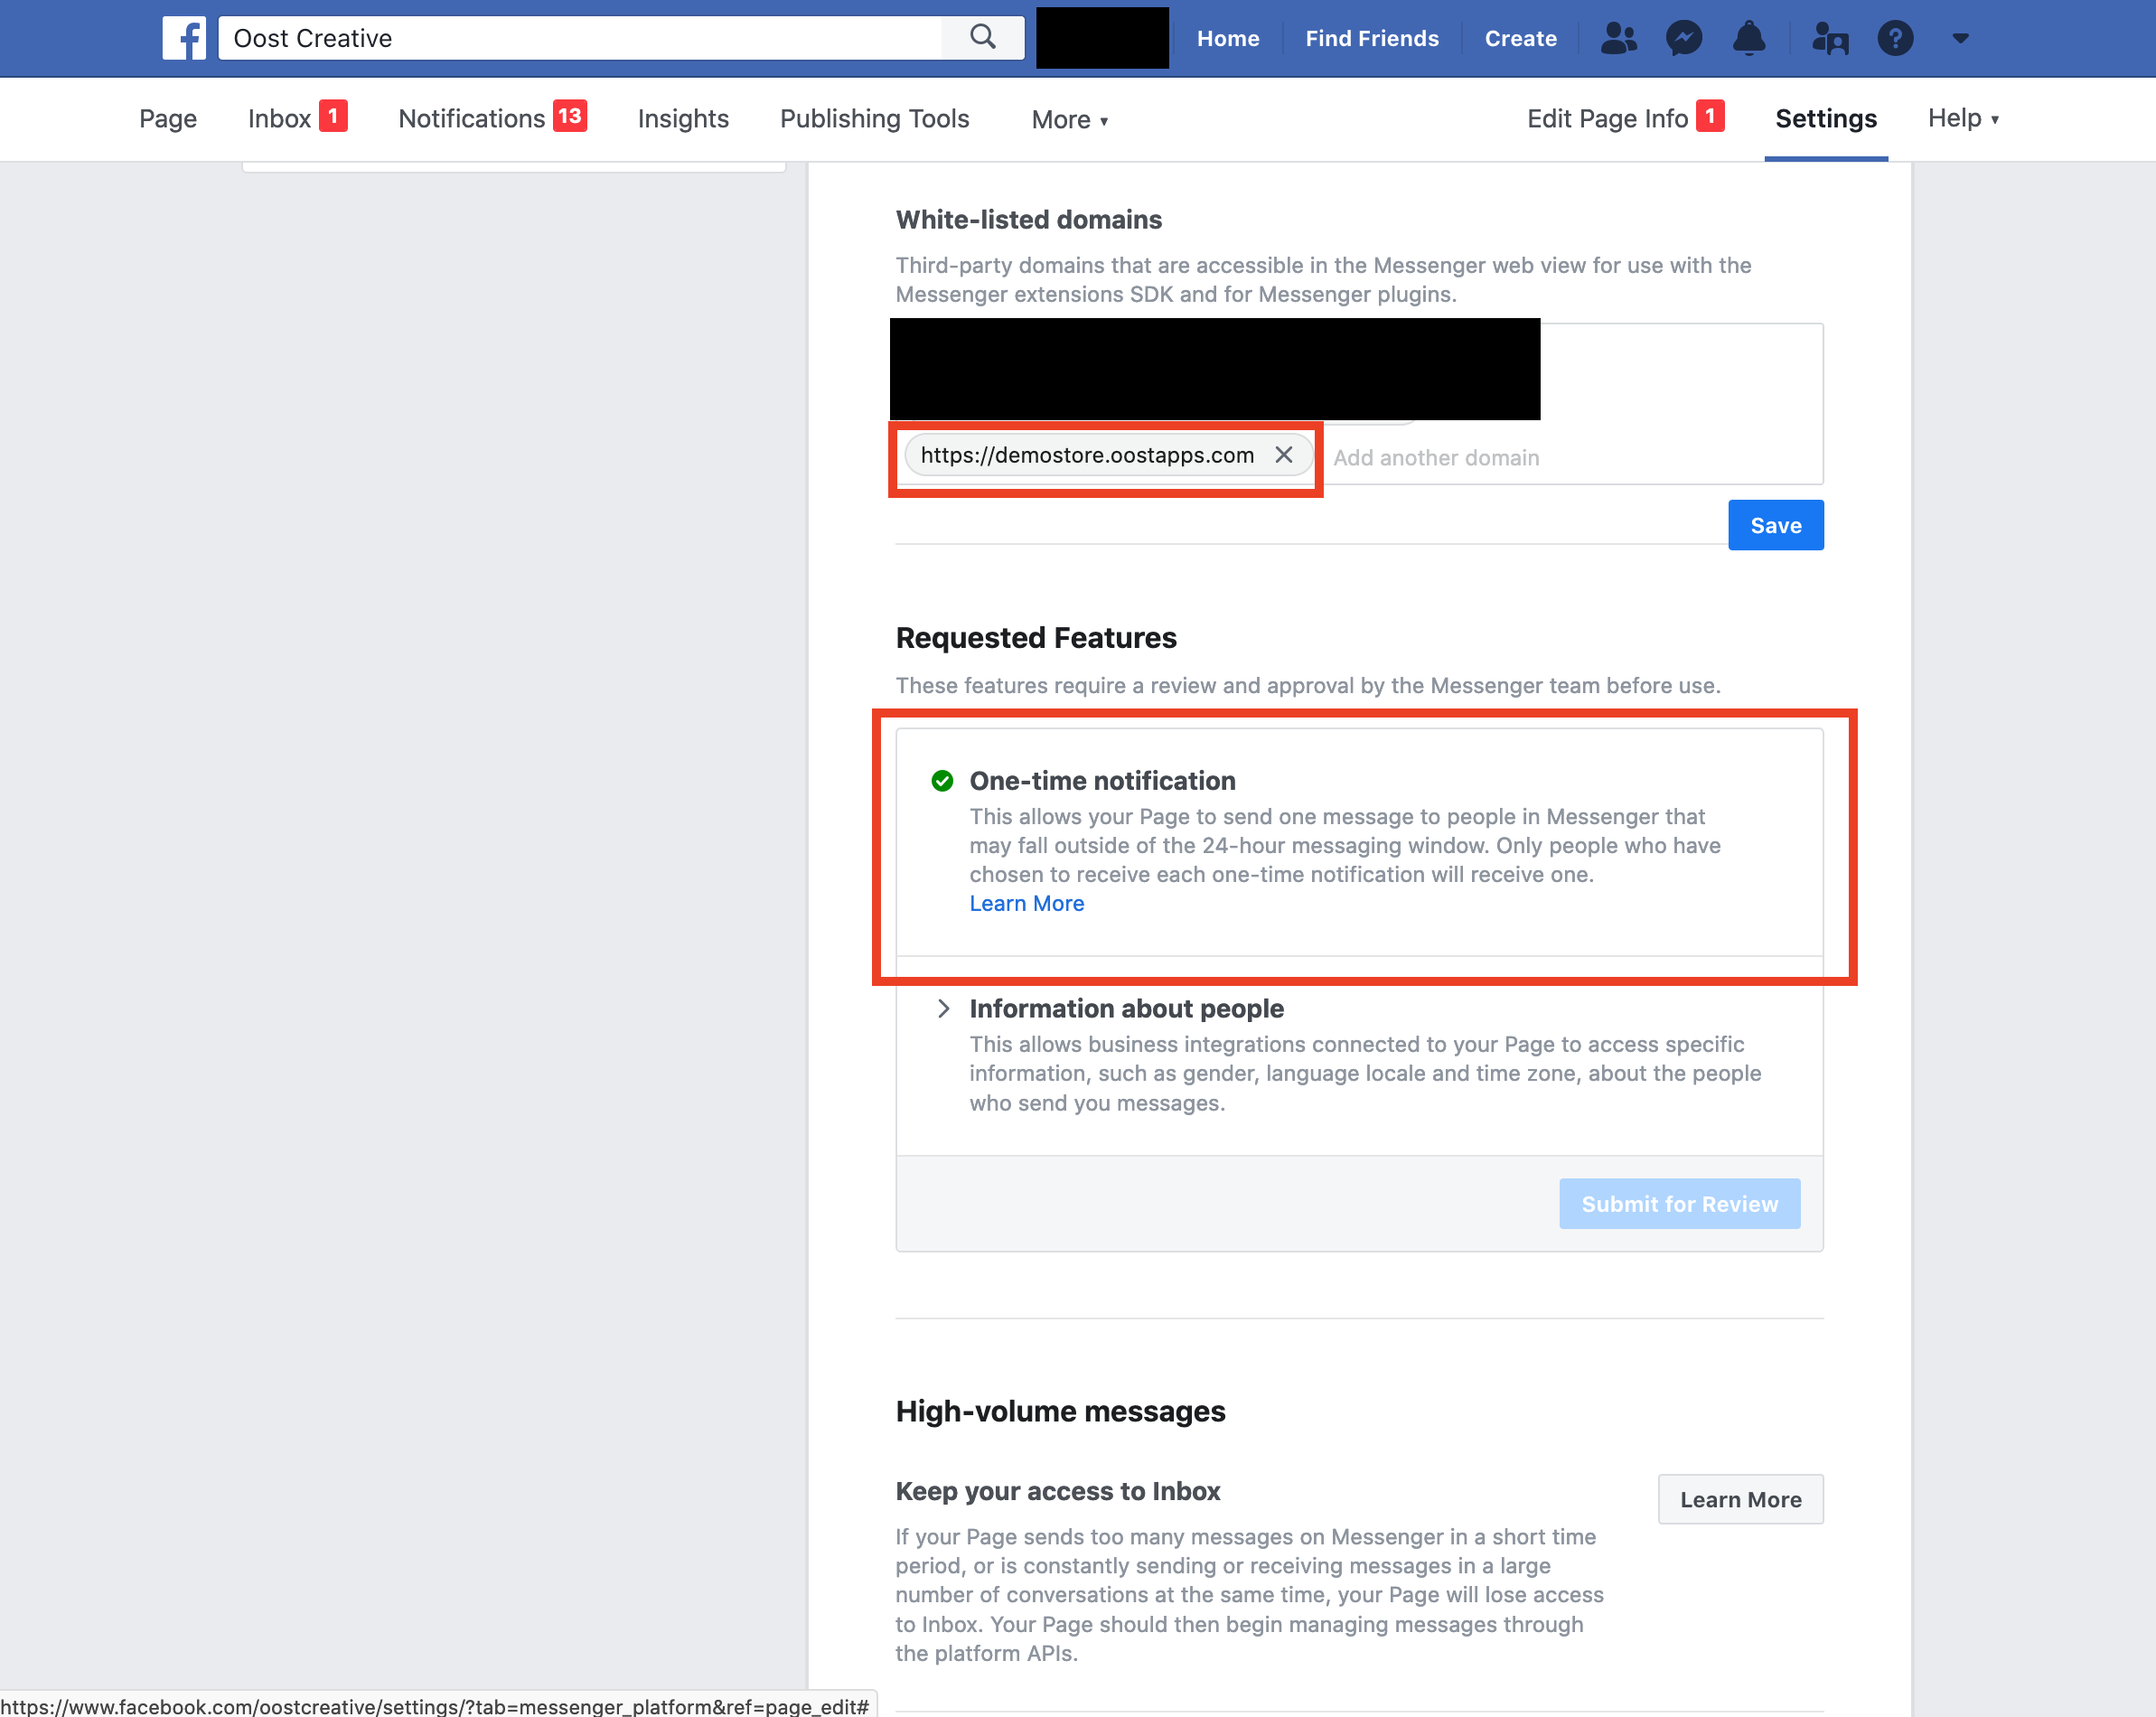
Here there are two settings you must update.

  1. Add your store URL to the Whitelisted Domains settings. Remember to put the full url, including ‘https://’ at the beginning. This will ensure that that Facebook widget can load correctly.
  2. Select the One-time notification requested feature - this allows us to send a notification to users at a later date (when the product comes back in stock).

Integration

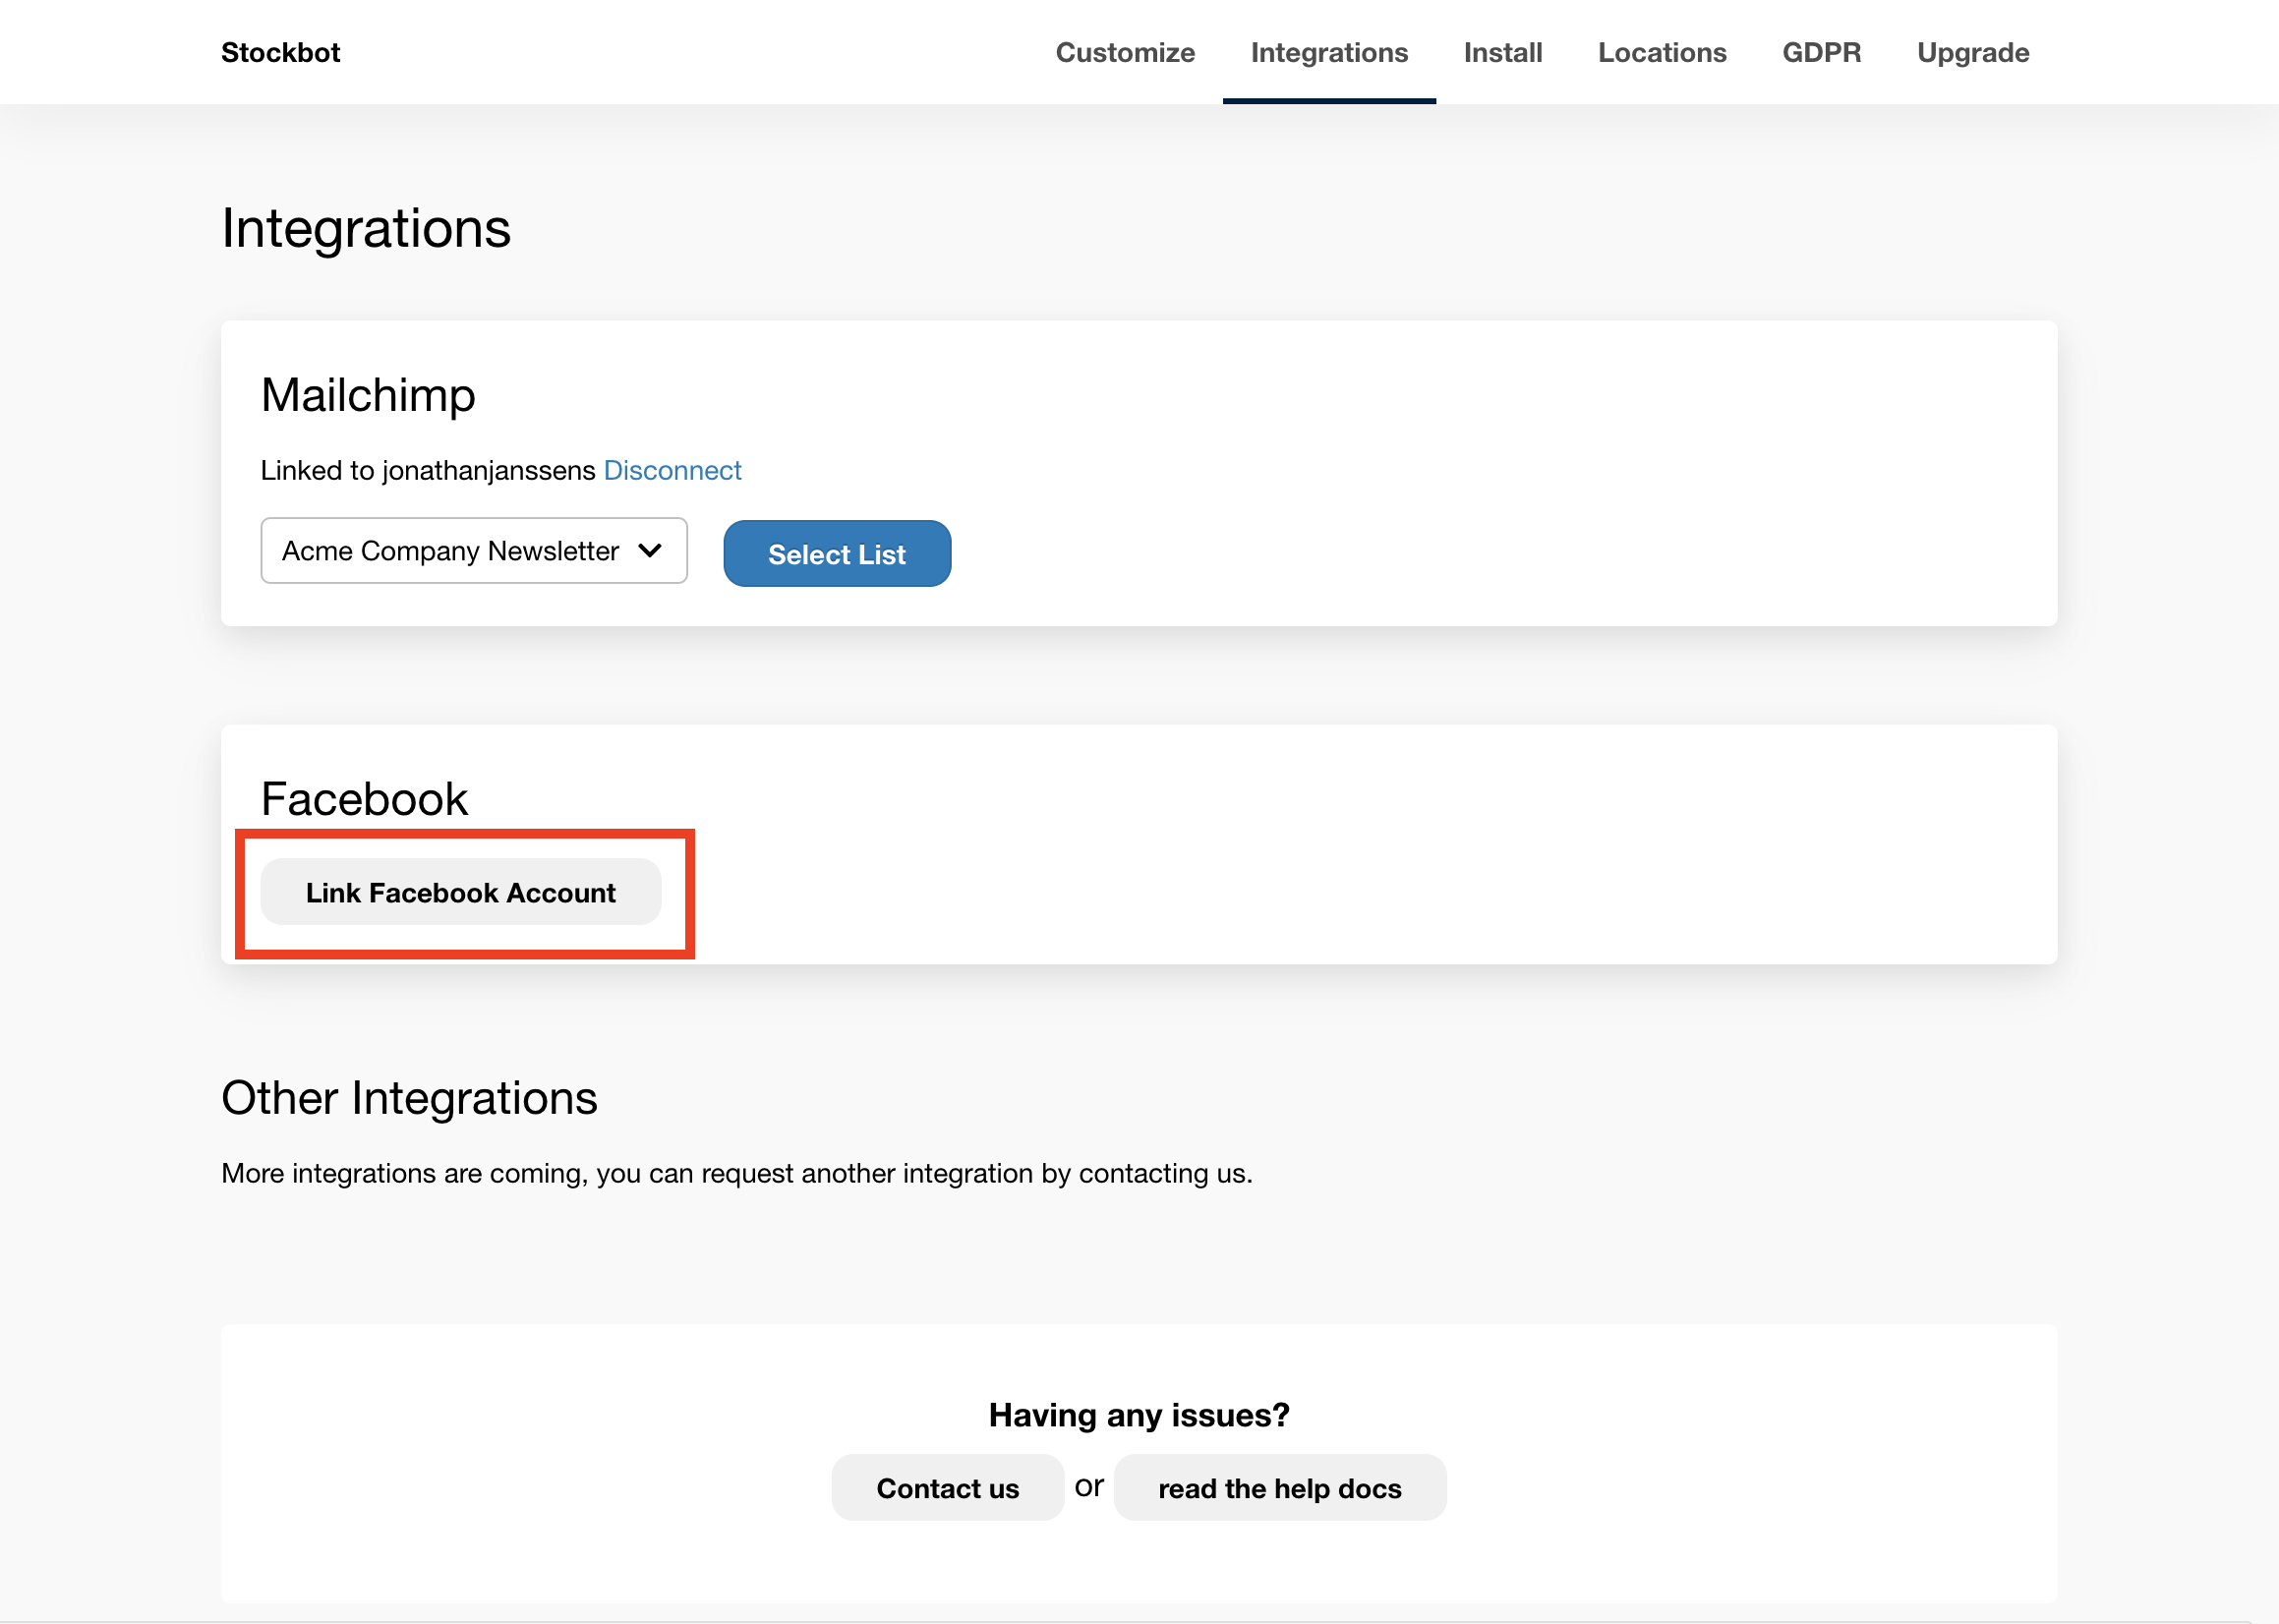
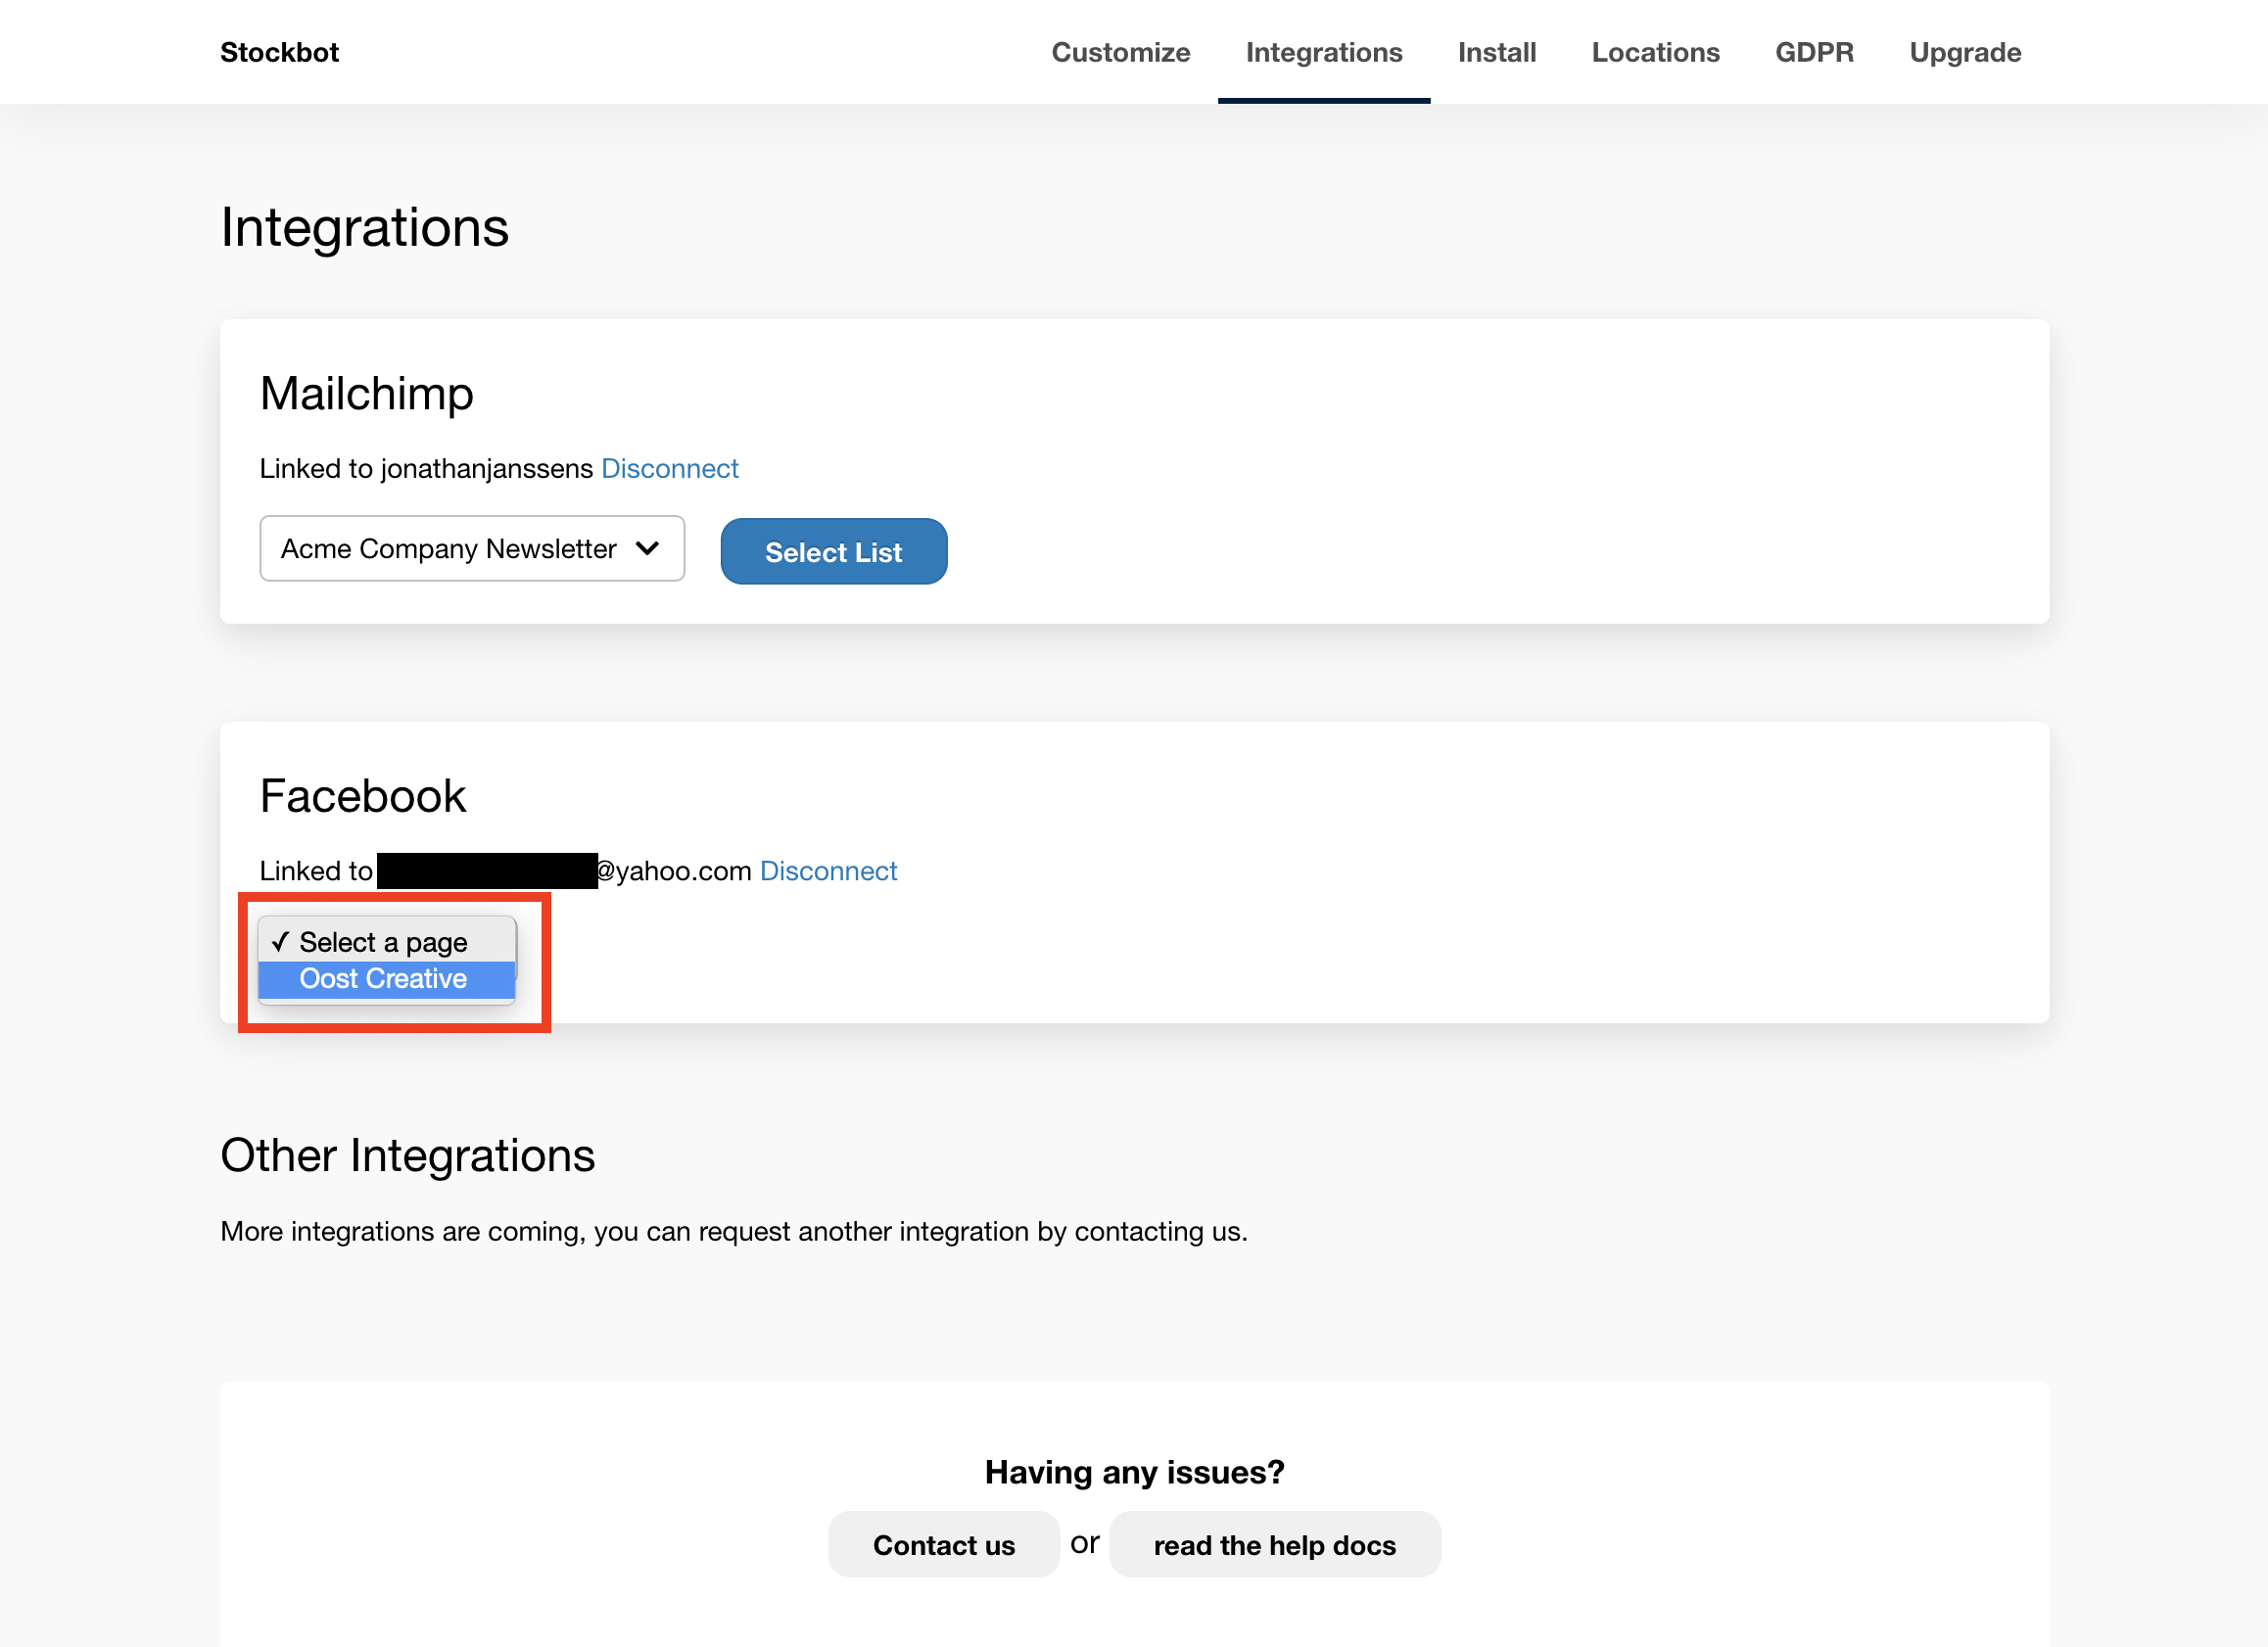
To complete the integration within Stockbot you head over to the Integrations panel within the app and connect your Facebook Account.

You will be redirected to Facebook where you must login and select a page you would like to link to Stockbot. Follow the promps within Facebook to connect the page.

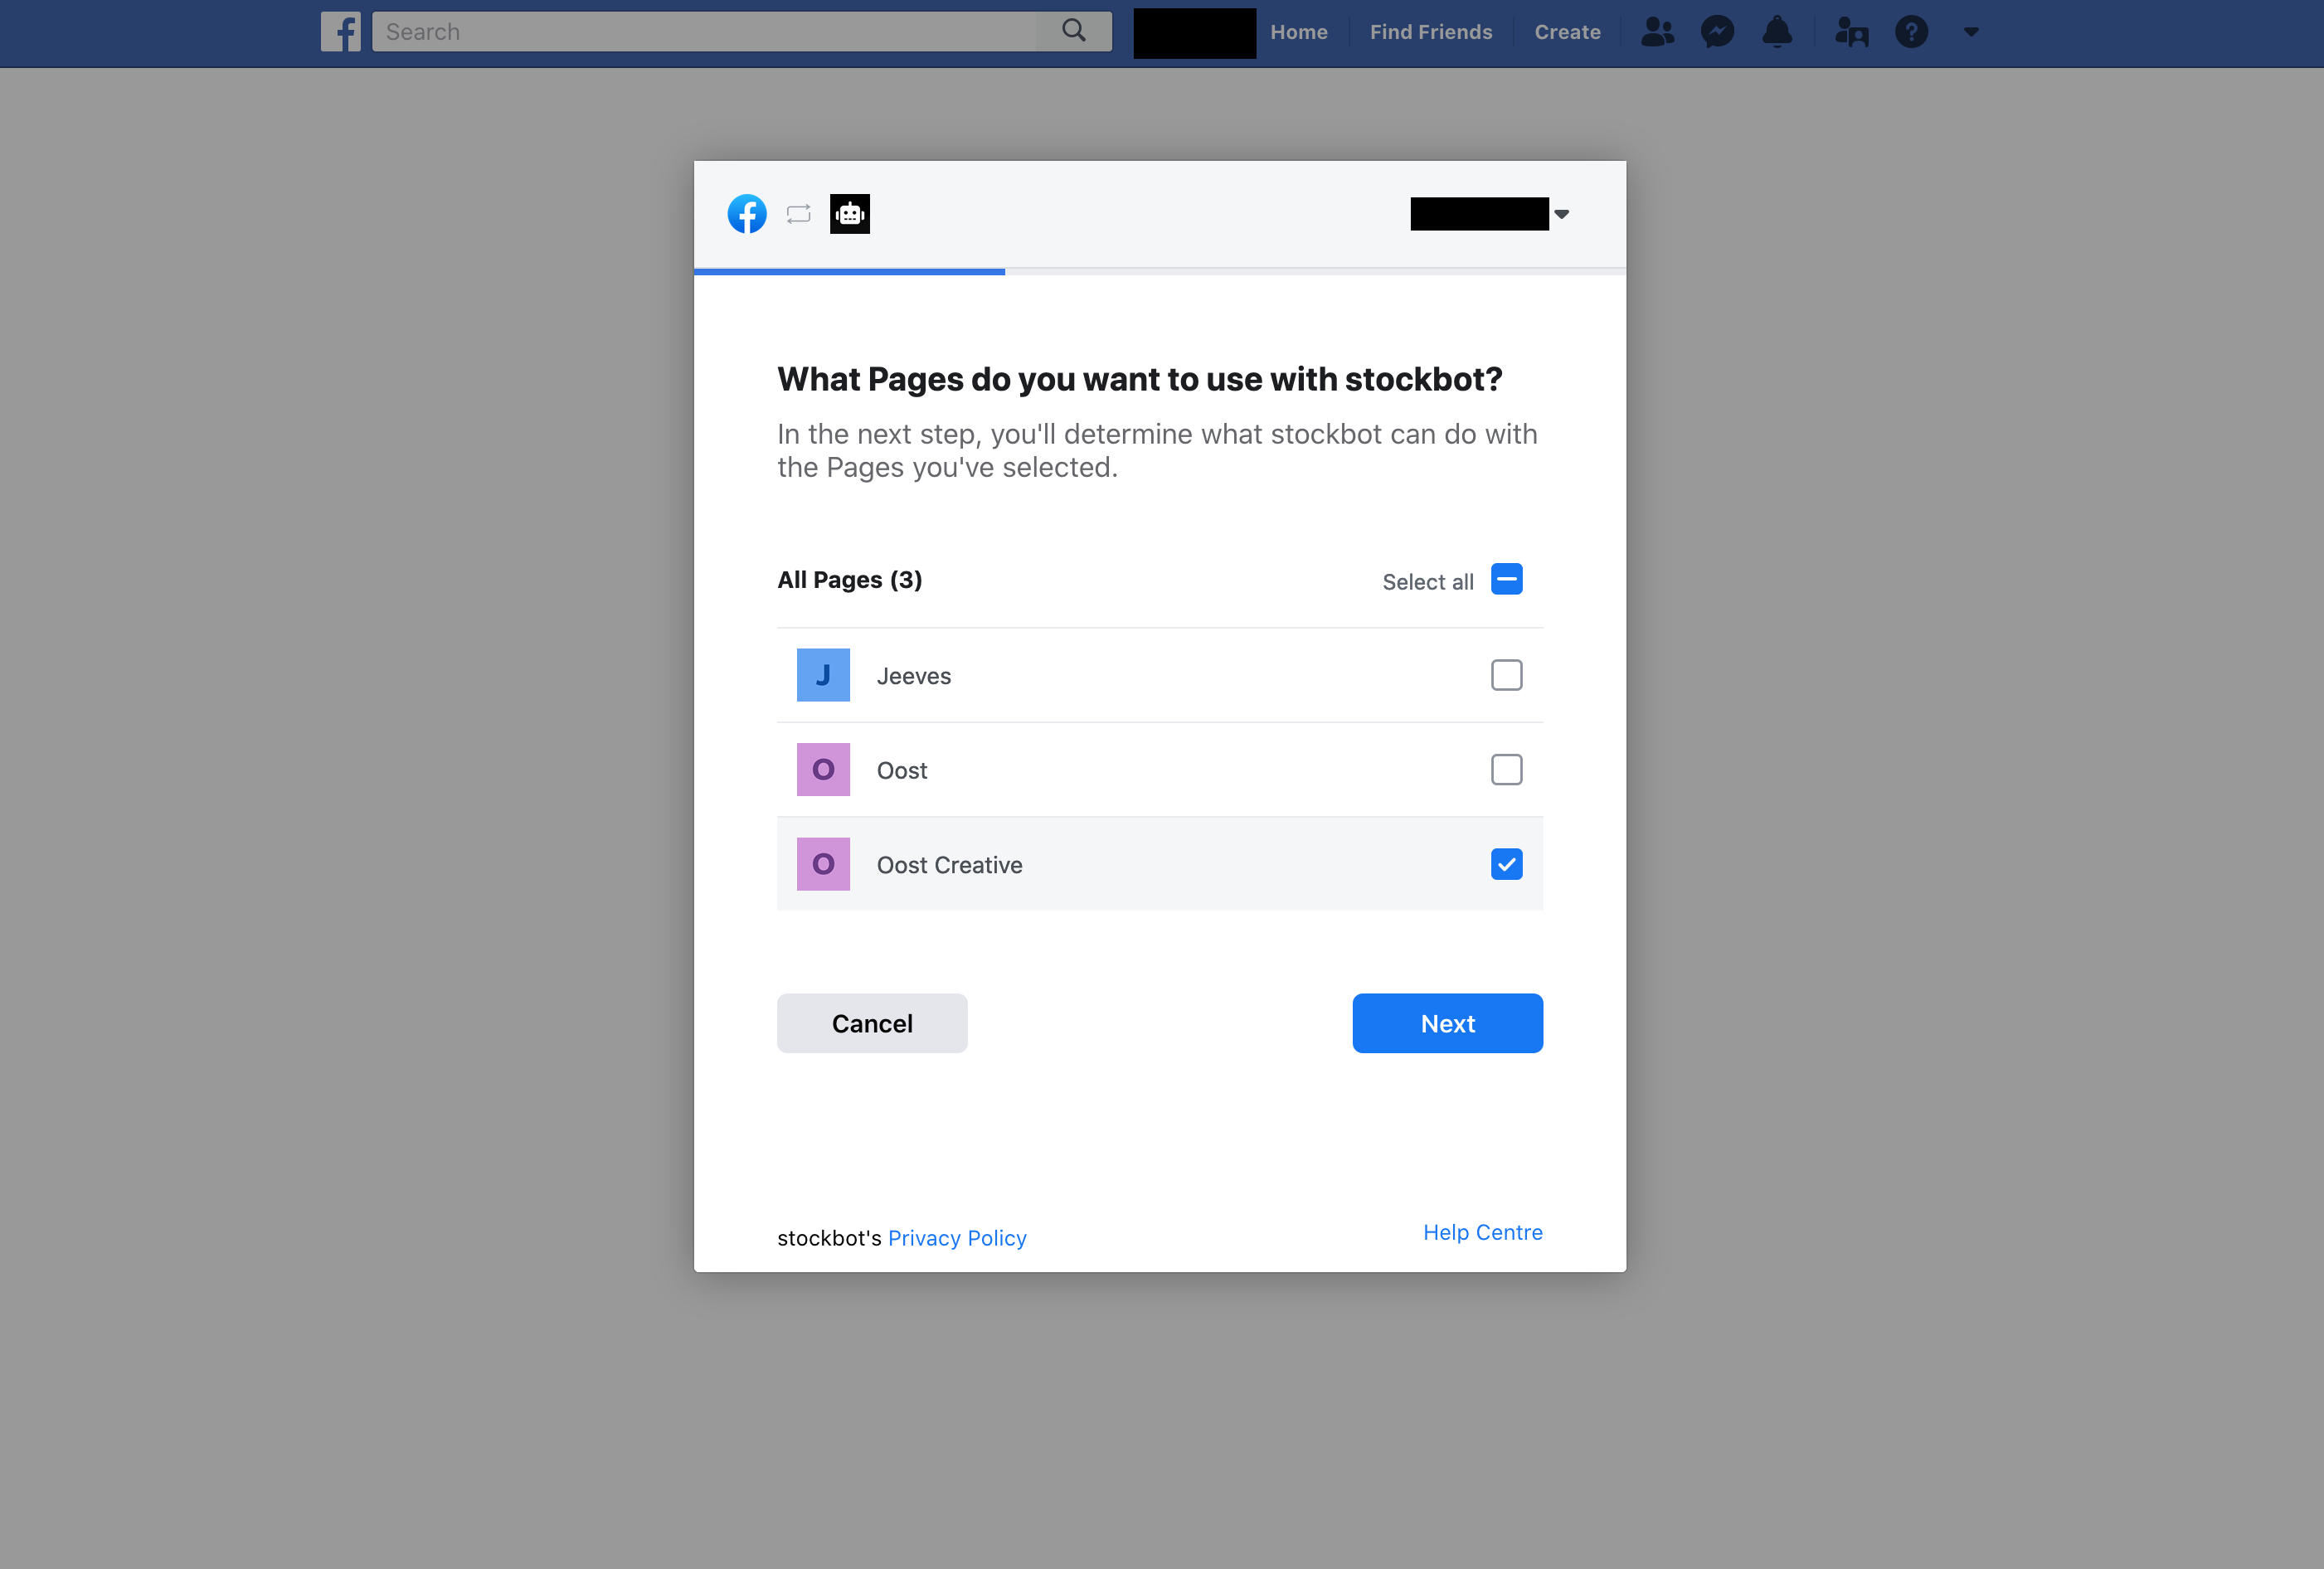
Once completed you will be redirected back to Stockbot, here you just select the page you want to send messages from and save the settings.

If you still need help please contact us.

Related Articles

Facebook Messenger Integration

Stockbot Messenger integration allows you to send back in stock notifications to customers straight to their Facebook Messenger inbox. This provides better open rates than email as well as opening a conversation with the customer for you to manually send messages to them. Requirements The only requirements for the integration are that your company has a Facebook page, and you have management access to that page. Setup To setup your Facebook page there are two simple steps you must complete.

Headless Usage

You can use Stockbot in a ‘headless’ manner, in this case you would have your own code to collect email addresses and phone numbers. Sample Request You will want to make a POST request of the following form. You must set your store’s myshopify.com domain in a X-Shopify-Domain header so we know where your request originates from. Here we are using CURL but you could also make requests from any language of your choice.

Integrations

Currently we support Mailchimp integration which allows you to add customers to a selected audience in Mailchimp if they choose to when signing up for email notifications. Mailchimp To connect your Mailchimp account you can follow the steps outlined here. Note that your audience cannot have any required fields apart from email address. If you do integration will not work because we only collect the email address from your customers.

Installation

First Installation 1. Copy the installation code You will need to add this code to your theme so our app will know where to display the signup form for customers. {% capture the_snippet_content %}{% include 'oost_stockbot_inline_settings' %}{% endcapture %} {% unless the_snippet_content contains "Liquid error" %}{% include 'oost_stockbot_inline_settings' %} {% endunless %} 2. Add the code to your product form The code must be added to the template that displays the product form.