Installation

published February 10, 2020 | updated February 10, 2020

First Installation

1. Copy the installation code

You will need to add this code to your theme so our app will know where to display the signup form for customers.

{% capture the_snippet_content %}{% include 'oost_stockbot_inline_settings' %}{% endcapture %} {% unless the_snippet_content contains "Liquid error" %}{% include 'oost_stockbot_inline_settings' %} {% endunless %}

2. Add the code to your product form

The code must be added to the template that displays the product form. This could be different depending on your theme but is generally in one of a few places.

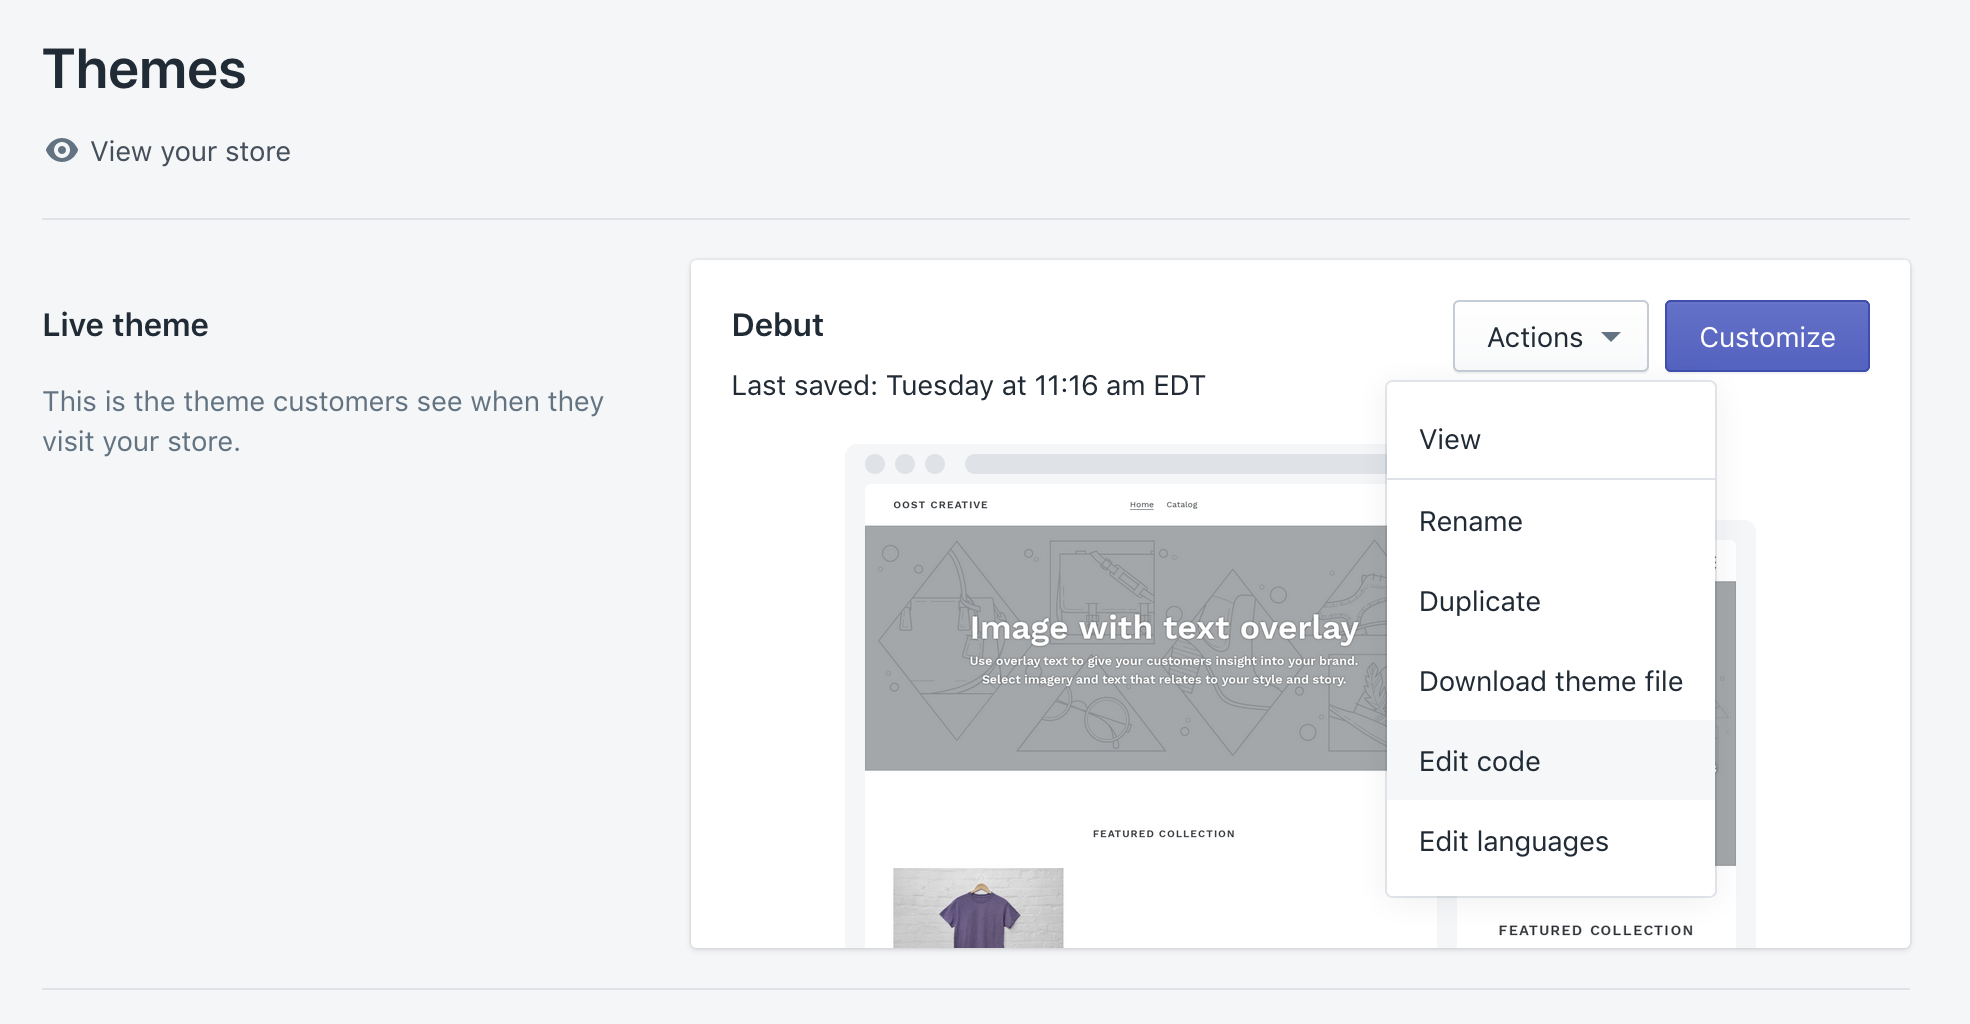
  • Login to your admin area
  • In the sidebar navigate to Online Store -> Themes
  • Click the Edit Code button on your current theme

Edit Code

  • Open the file under templates/product.liquid and look for the product form, it will look something like the code highlighted in red below.

Product Form

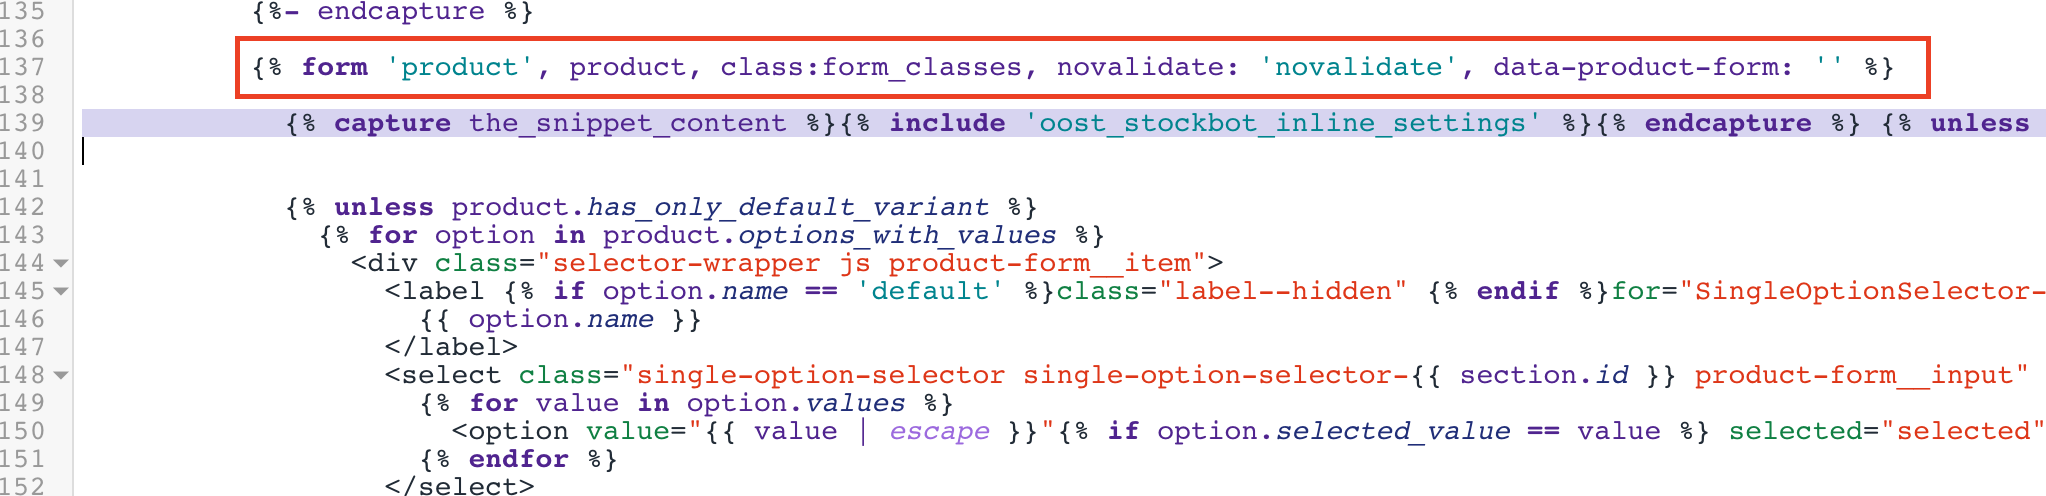
If you cannot find the product form look around in different templates such as sections/product-template.liquid or check out our guide on how to find the Shopify product form. Contact us if you need help.

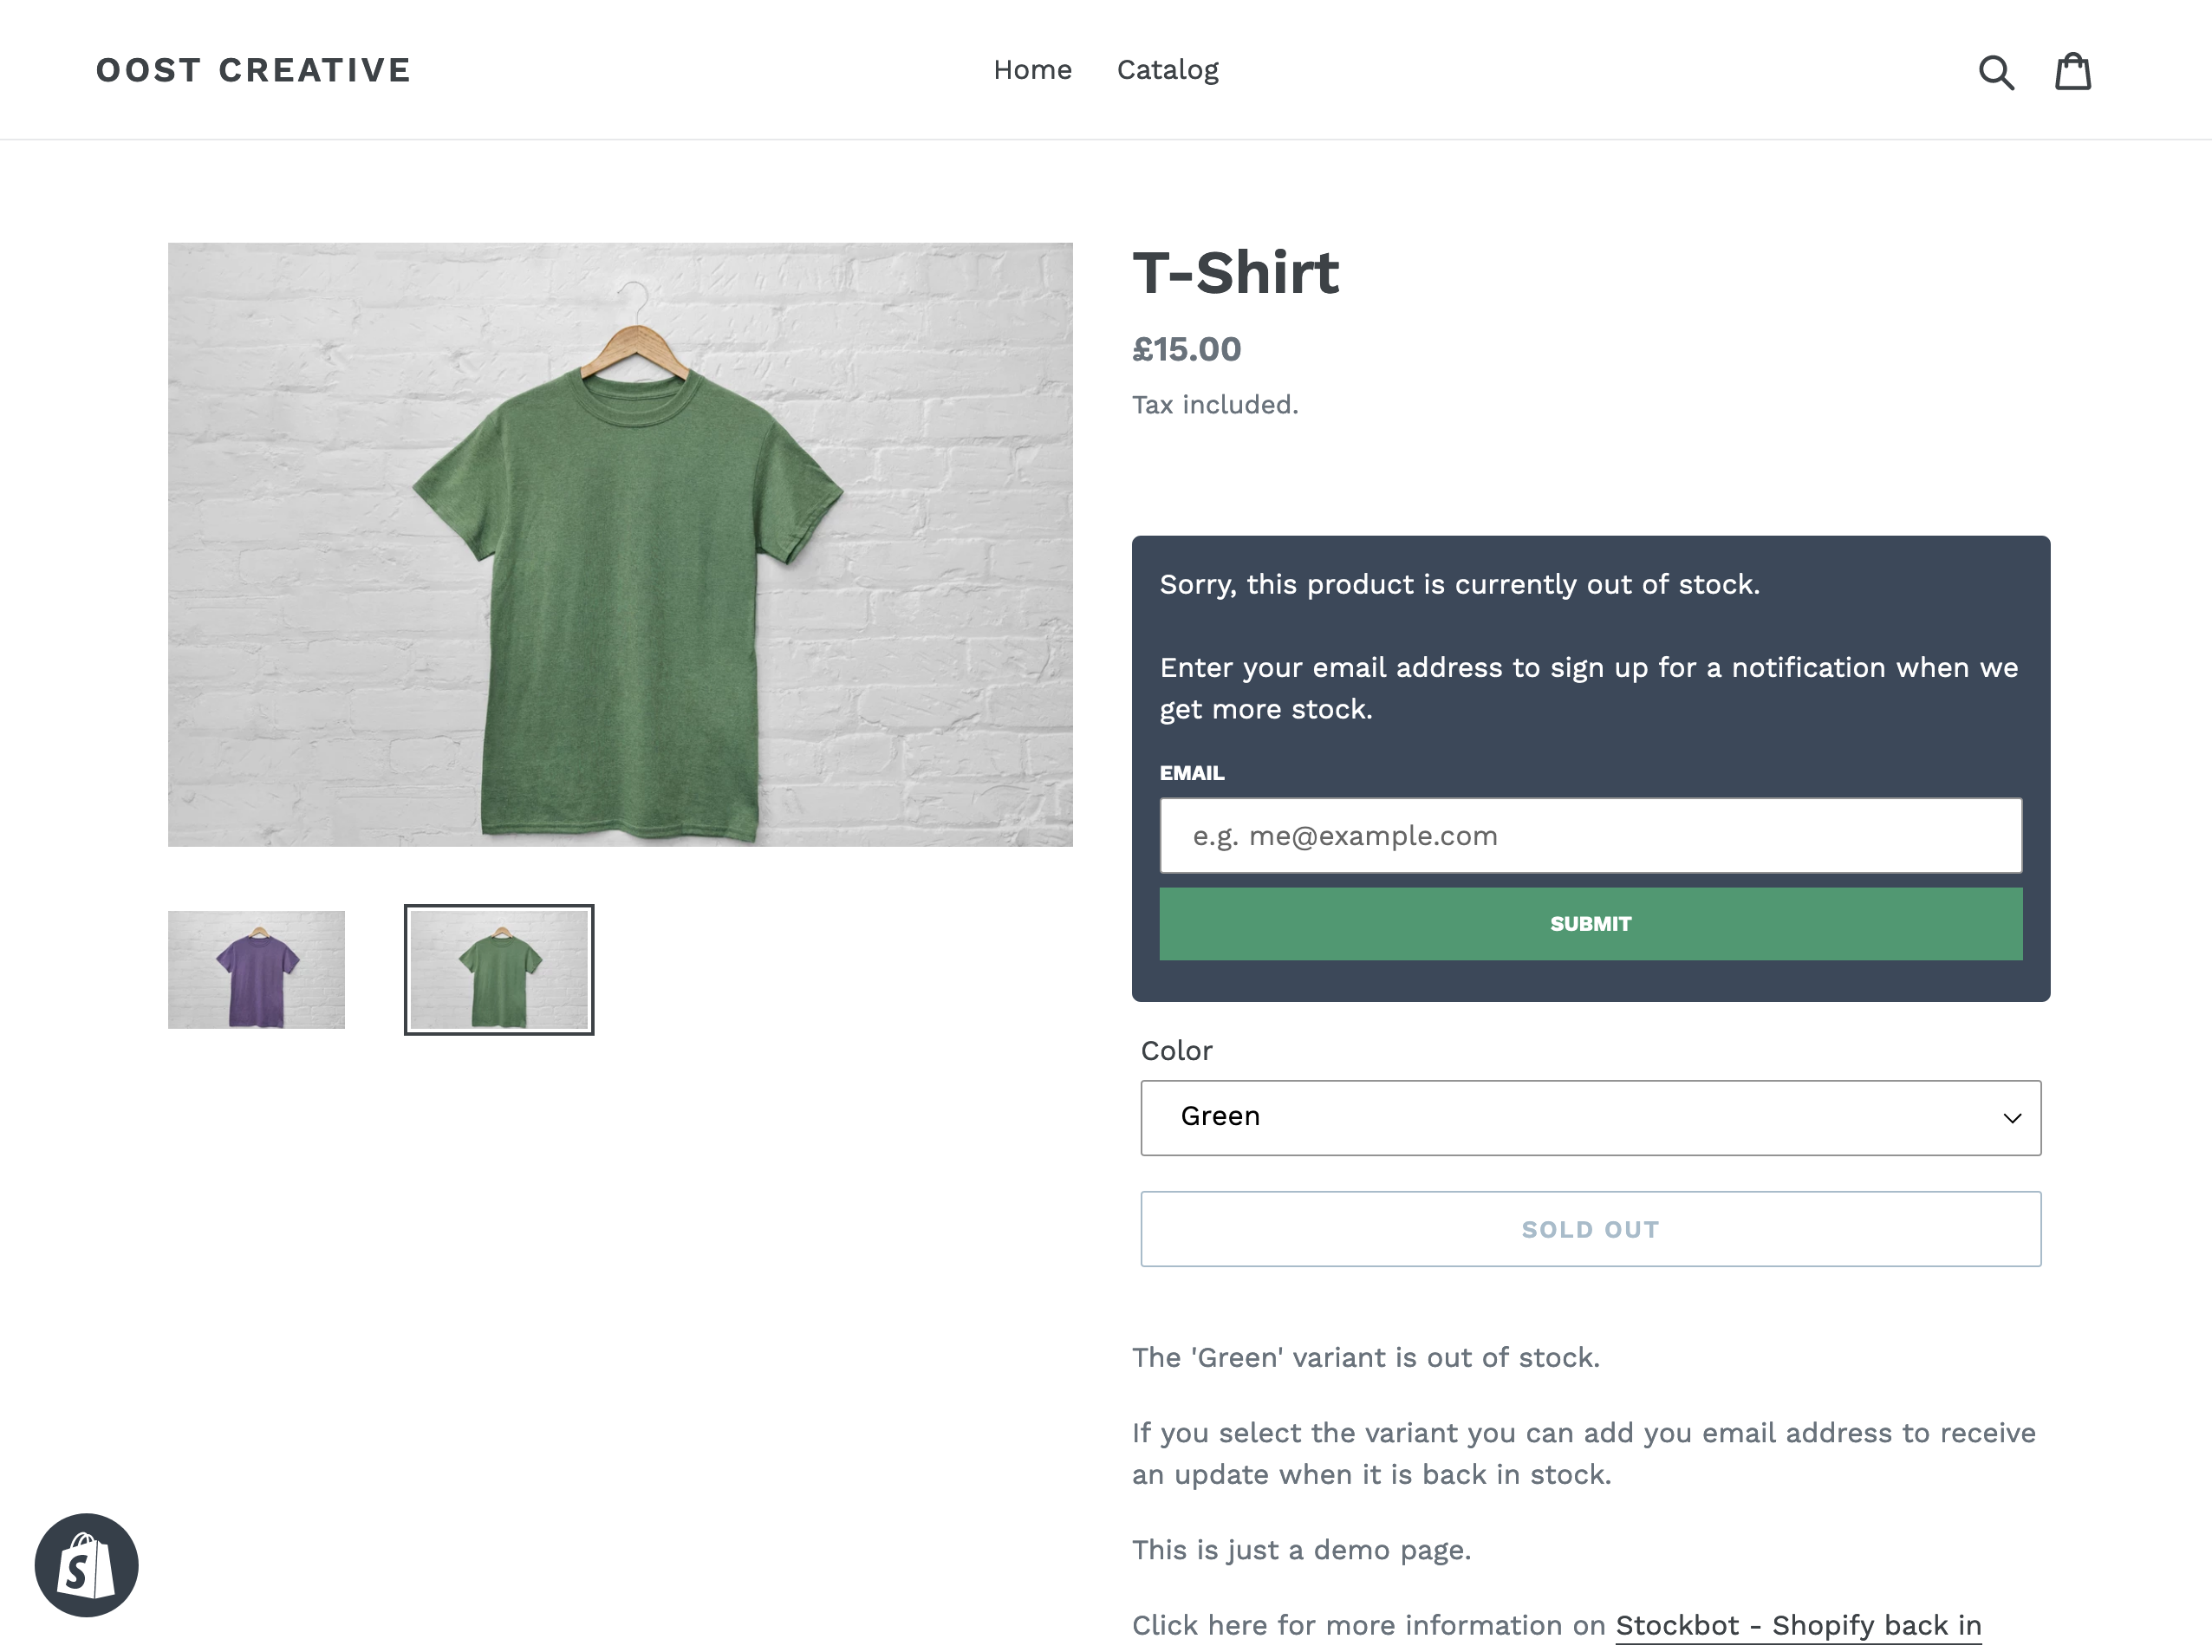
  • Paste the code from step 1 below the product form
  • Check on the product page where you have an out of stock variant, the form should display when that variant is selected

Example product page showing out of stock form

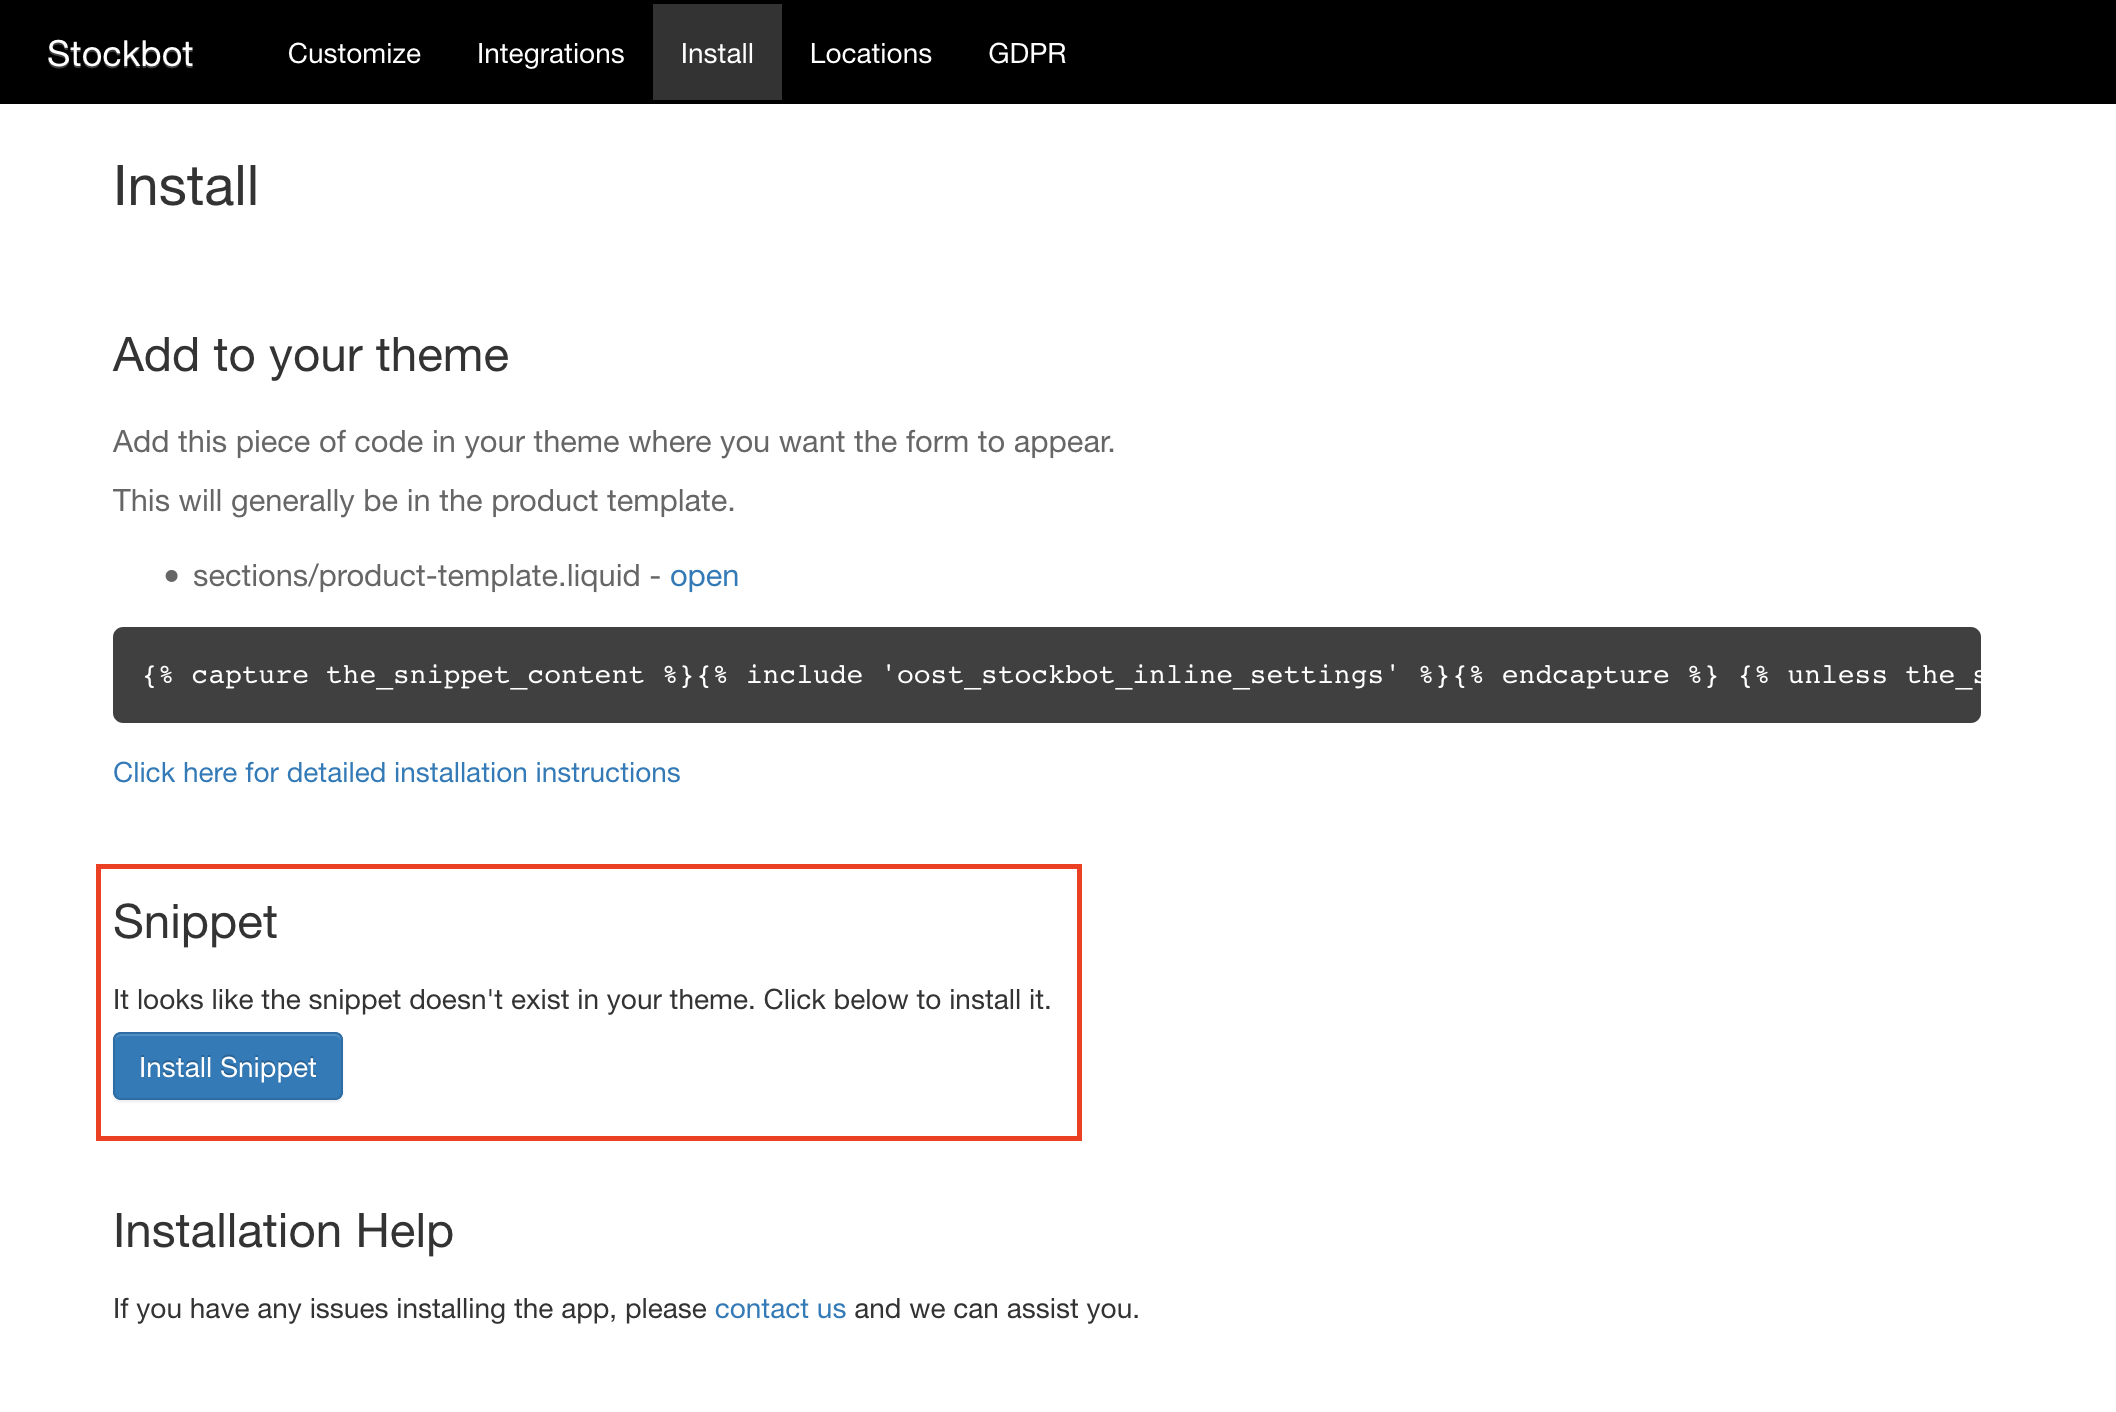
3. Install the Snippet

Our app will automatically install the snippet in your theme.

If you have edited the contents of the snippet file or changed themes just click the “Install Snippet” button and this will be done in the background.

Install snippet button

Changing Themes

If you change themes these changes will be lost, you will have to carry out the installation steps again with your new theme.

Contact us if you need help

If you cannot install the app, just let us know and we will assist you.

If you still need help please contact us.

Related Articles

Facebook Messenger Integration

Stockbot Messenger integration allows you to send back in stock notifications to customers straight to their Facebook Messenger inbox. This provides better open rates than email as well as opening a conversation with the customer for you to manually send messages to them. Requirements The only requirements for the integration are that your company has a Facebook page, and you have management access to that page. Setup To setup your Facebook page there are two simple steps you must complete.

Headless Usage

You can use Stockbot in a ‘headless’ manner, in this case you would have your own code to collect email addresses and phone numbers. Sample Request You will want to make a POST request of the following form. You must set your store’s myshopify.com domain in a X-Shopify-Domain header so we know where your request originates from. Here we are using CURL but you could also make requests from any language of your choice.

Integrations

Currently we support Mailchimp integration which allows you to add customers to a selected audience in Mailchimp if they choose to when signing up for email notifications. Mailchimp To connect your Mailchimp account you can follow the steps outlined here. Note that your audience cannot have any required fields apart from email address. If you do integration will not work because we only collect the email address from your customers.

Installation

First Installation 1. Copy the installation code You will need to add this code to your theme so our app will know where to display the signup form for customers. {% capture the_snippet_content %}{% include 'oost_stockbot_inline_settings' %}{% endcapture %} {% unless the_snippet_content contains "Liquid error" %}{% include 'oost_stockbot_inline_settings' %} {% endunless %} 2. Add the code to your product form The code must be added to the template that displays the product form.